
Mood Boards are a great tool for wedding suppliers and brides.
Whether you want to put something together to show your clients, for a blog post, or just to help get those creative juices flowing, having your ideas together in one space gives instant clarity and inspiration.
These days there’s no need to spend hours struggling with photoshop. Cool graphics tools like Canva make it really easy to put something together that looks smart and professional.
For someone like me with very little natural design ability the templates make it easy to create something visually gorgeous. And if it’s technical skills you lack then the interface is straightforward and doesn’t take long to master.
Here’s a step-by-step guide to creating a mood board with Canva.
Step 1
Sort out a selection of images you want to use and think about any text you want to add.
Step 2
Log in to (or create) your account with Canva. All the steps below can be achieved using the free version.
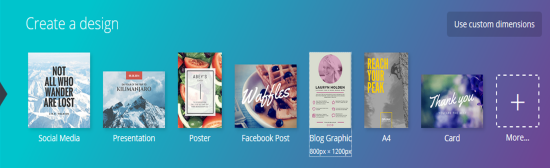
Choose the size of graphic you want. I’m going to choose blog graphic (800 x 1200 px) as that is also a good size for Pinterest.
Step 3
Canva will open a new window with your blank graphic. From the left hand menu choose Elements and then Grids.
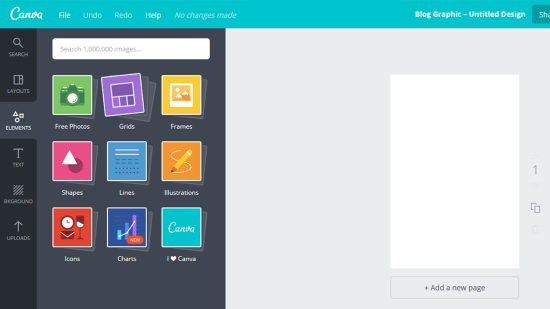
Select the grid layout of your choice – this will depend on the number of images you have, their orientation and relative sizes. I’ve gone for a 5 image grid.
Step 4
Next select Uploads from the left hand menu and upload the images you want to use.
Now drag and drop your images into the grid. Play around with the layout until you get the look you want.
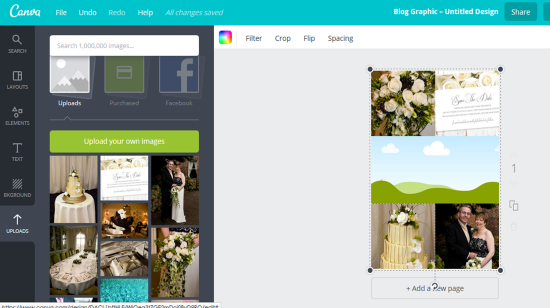
Click on an individual image within the layout and you will see a selection of options on the top menu bar. These let you edit your images. You can add filters, flip the images around and change the spacing between them. Use the Crop tool to zoom in and move the image around so it fits nicely into the space.
Step 5
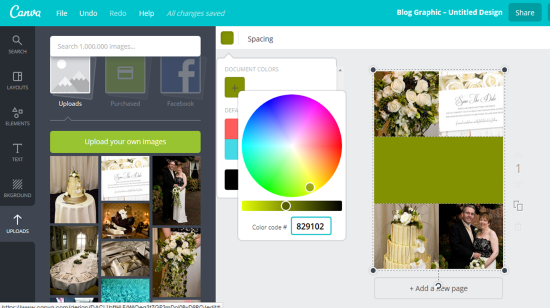
Now for the last section I want a plain colour block with some text. I click on the empty block and choose the colour selector from the top menu. Click the + sign to add a colour and enter the hex code of the colour I want. Quick tip – Canva doesn’t have a colour picker (eyedrop tool) so if you want to exactly match colours from your images find the hex codes for the colours before you start. I use paint.net.
Step 6
Now I’m going to add text. Select Text from the left hand menu and click on Add Heading. Enter your text and use the options from the top menu to change fonts colours etc.
Step 7
Once you are happy with your finished mood board you can download it to your computer and it’s ready to use and share.
Here’s my finished board (and yes, that is me in the picture!):
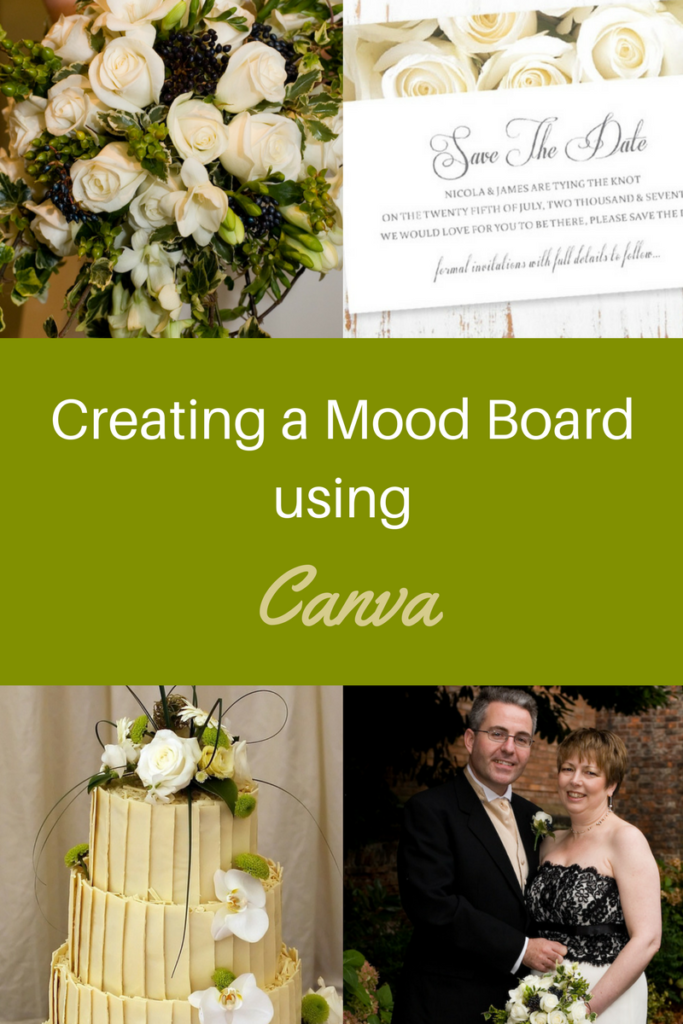
Photo credits:
Save the Date cards by Tree of Hearts Wedding Stationery
Cake: Stock photo
My wedding photos: Andy Bulmer